FREE: 10 Must-Know Tomato Growing Tips Get The Guide
Read our affiliate disclosure here.
What’s the Best Soil for Tomato
Plants?
Since 2010, Tomato Dirt has garnered 4.8+ million views, making it the web’s leading online source for growing tomatoes in the home garden. Award-winning writer and Tomato Dirt owner Kathy Widenhouse has helped thousands of home gardeners grow healthier tomatoes. Be one of them when you get Tomato Dirt’s Growing Guide here.
Posted 4.29.25
The best soil for tomato plants is well-draining, nutrient-rich loamy soil that is slightly acidic (pH around 6.0 to 6.9).
And that recipe is the same whether you’re growing tomatoes in an in-ground garden, in raised beds, or in containers.
If you’re growing tomatoes in containers, you can get off to a good start by choosing a high-quality potting mix that formulated specifically for tomato plants, such as FoxFarm Ocean Forest Potting Soil, Espoma Organic Potting Mix, ProMix Organic Vegetable and Herb Mix, Black Gold Natural & Organic Potting Mix, or Miracle-Gro Performance Organics Container Mix – all with extra compost (more nutrients), perlite (for drainages, and worm castings (for root health.)
But what if you’re growing tomatoes in your garden plot or even in raised beds? Adding bags and bags of potting mx is too expensive.
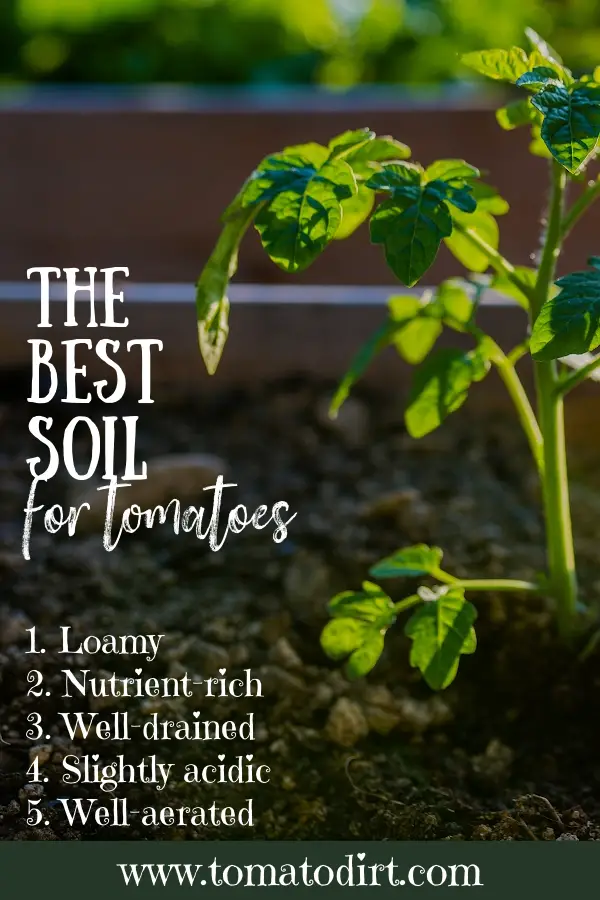
Remember – the best soil for tomato plants has got 5 characteristics. It’s loamy, nutrient-rich, well-drained, slightly acidic, and well-aerated. Here are a few cost-effective tips to help make sure you’ve got the best soil for tomato plants in your very own garden.
The best soil for tomato plants has 5 characteristics
Characteristic #1. The best soil for tomato plants has a loamy texture
Loam is a soil mixture of sand, silt, and clay in roughly equal proportions.
Its balance makes it ideal for gardening. Sand and silt allow good drainage. The clay helps retain moisture.
Tomatoes need a balance between holding moisture (so roots don’t dry out) and draining excess water (to prevent diseases like root rot). Loamy soil offers that balance — it holds water but still lets excess moisture drain away.
How can you know whether your garden soil is loamy enough for tomato plants? Here are a few simple tests you can conduct on your own garden soil to know whether you need to add sand or organic matter.
1. The "Squeeze" Test
- Grab a handful of moist (but not
soggy) soil. Squeeze it in your hand, then open your hand.
What to look for: - If it falls apart easily with a light poke, it’s loamy —good for tomatoes!
- If it stays in a hard ball and doesn’t break up, it's too clay-heavy (needs loosening).
- If it crumbles apart instantly before you even poke it, it’s too sandy (needs more organic matter).
2. The "Jar" Test (Also called the "Soil Sedimentation Test")
- Take a clear jar (like a mason
jar). Fill it ⅓ full with your garden soil. Fill the rest with water, leaving a
little space at the top. Add a few drops of dish soap (to help the particles
separate). Shake it hard for 1–2 minutes, then set it down to settle for a few
hours (or overnight).
What to look for: - Sand settles first (bottom layer).
- Then silt (middle layer).
- Clay stays suspended longest (top layer).
- What a loamy soil looks like:
- About 40% sand, 40% silt, and 20% clay.
- The layers should look fairly even, not dominated by one.
Quick tip to check for loamy soil
If your soil crumbles nicely, drains well but holds some moisture, and your tomatoes grow strong and healthy — it’s probably loamy enough! If it’s too sticky (clay) or too loose (sand), you’ll want to amend it before planting.
Characteristic #2. The best soil for tomato plants is nutrient-rich
Tomatoes are heavy feeders. They pull plenty of nutrients from the soil in order to make the trip from tiny little seed to seedling to plant to flowering to fruiting in just a few weeks.
Soil enriched with compost or aged manure provides essential nutrients for healthy growth. Organic matter (like compost) slowly releases a wide range of nutrients tomatoes need (nitrogen, phosphorus, potassium, calcium, magnesium) — supporting strong root systems, vigorous growth, and lots of healthy fruit.
How can you know whether your garden soil has enough organic matter to grow tomato plants? Here are some simple tests you can conduct.
1. Color check
Soil rich in organic matter tends to be dark brown or black, because decomposed organic material (humus) darkens the soil. If your soil is light-colored (pale brown, gray, or tan), it probably needs more organic matter.
2. Texture check
Grab a handful of moist soil and rub it between your fingers. Soil with good organic matter feels soft, crumbly, and a little spongy — almost like chocolate cake crumbs. If it feels hard, gritty, sticky, or compact, it’s likely low in organic matter.
3. Earthworm test
Dig up a small section of soil (about 6 inches deep and wide). Look carefully. If you find 5–10 earthworms in that small section, that's a great sign of rich organic matter (worms love organic soil). Few or no worms? Your soil probably needs more organic material.
4. Water absorption test
Pour a little water on bare soil. Good organic matter helps soil absorb water steadily — not instantly soaking through like sand, and not sitting on top like puddles on clay. If water soaks in smoothly and evenly, your organic levels are probably good.
In short:
- Dark, crumbly, spongey soil = good organic matter.
- Light, sticky, gritty, or hard soil = needs more organic matter.
Quick tips for nutrient-rich soil
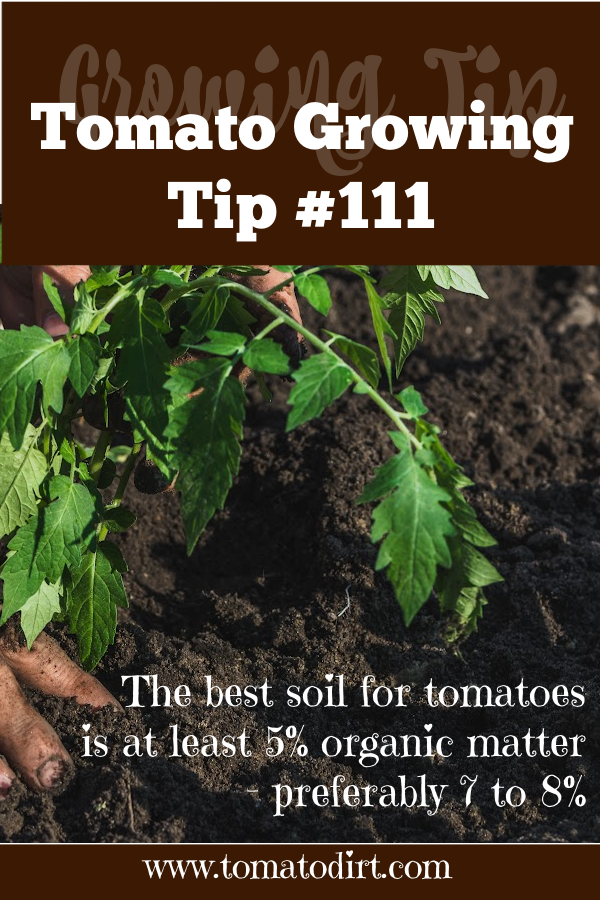
- Ideally, for tomatoes, you want soil with at least 5% organic matter — even better if it’s 6–8%. Even if your soil is "pretty good," adding a little more compost each year (at planting time and mid-season) will make a huge difference in plant size, fruit size, and yield.
- Before planting, spread 2–3 inches of compost evenly over the planting area. Mix it into the top 6–8 inches of your existing soil with a shovel, garden fork, or tiller.
- Example: If your garden bed is 10 feet long × 3 feet wide = 30 square feet. For 30 square feet, you’ll need about 2.5–3 cubic feet of compost. One large bag of compost from a garden center usually contains about 1 cubic foot.
Characteristic #3. The best soil for tomato plants has good drainage
Tomato roots need oxygen as much as they need water. If the soil stays soggy, roots can "drown," leading to poor growth, diseases like blight, and eventually plant death.
Too much water = root rot. Too little = stressed, unhealthy plants. Well-draining soil prevents water from pooling around the roots.
Here’s how you can tell if your soil drains well enough for tomatoes.
1. Simple drainage test
- Dig a hole about 12 inches deep and 12 inches wide where you want to plant your tomatoes. Fill the hole completely with water. Let it drain completely. Immediately refill the hole with water a second time. Now watch and time it:
- Good drainage = water drains away within 1–2 hours.
- Poor drainage = water still sitting there after 3–4+ hours.
- If the drain time is less than 30 minutes, your soil is too sandy. It’s still okay for tomatoes if you add compost.
2. Look for natural clues
- After rain, the water puddles on the soil for hours or days: bad drainage.
- The ground feels sticky, soggy, or heavy underfoot often: too much clay, poor drainage.
- The surface dries quickly, but the roots are moist below: ideal drainage.
3. Soil feel test
- Grab a handful of soil after a rain. Good-draining soil feels moist but crumbly, not sticky or soggy. If it sticks together like modeling clay, you have drainage problems.
In short: Good soil drains within 1–2 hours after soaking, doesn’t puddle, stays moist but not soggy, and allows roots to breathe.
Quick tips for good soil drainage
If your soil fails the drainage test, you can improve it with these tips.
- Mix in 2-4 inches of compost into the top 6-8 inches of soil to improve both water retention and drainage.
- Create raised beds. (They lift plants above poorly draining native soil)
- Add coarse sand (sparingly — but compost is usually better),
- Plant on small mounds or hills, about 6-12 inches high, so water drains off naturally
- Dig a shallow (2-3 inch) trench around plants to help channel excess water away from stems after rain.
- Double dig to loosen compacted layers.
- Aerate the soil with a pitchfork – insert it 6-8 inches every 6-12 inches apart to loosen the soil.
Characteristic #4. The best soil for tomato plants has a slightly acidic pH Level
Slightly acidic soil is ideal for tomatoes. Aim for a pH range of 6.0-6.8. Tomato plants absorb nutrients best in slightly acidic soil.
If your soil has a pH of 5.0-5.9, the acidity means poor growth and plenty of yellowing for your plants. If your soil has a pH of 6.9–7.5, its alkalinity means fewer flowers and fruit. Iron and phosphorus are less available, leading to weak plants and issues like blossom end rot.
Here’s how you can know if your soil’s pH is right for tomatoes:
1. Do a soil pH test
- Buy an inexpensive soil pH test kit or pH meter, usually a few dollars at a garden center or online. Follow the instructions — which usually starts with scooping soil into a cup. Add water and a testing solution or probe. Compare the color change (or digital reading) to a chart. You’ll know within minutes if your soil pH is in the right range for tomato plants.
2. Use vinegar and baking soda
- This quick trick isn’t perfectly scientific, but it gives you a rough idea about your soil’s pH suitability for tomatoes.
- Take two small soil samples.
- Add vinegar to one. If it fizzes, your soil is likely alkaline (pH above 7).
- Add baking soda dissolved in water to the other. If it fizzes, your soil is likely acidic (pH below 6).
- Note: This simple homemade test only tells you if your soil is acidic or alkaline — not how much. For tomatoes, an exact reading is better.
Quick tips for fixing your soil pH
- If your soil pH is too low (too acidic), add garden lime (crushed limestone) to raise pH slowly.
- If pH is too high (too alkaline), add sulfur, peat moss, or acidic compost to lower it.
- Always adjust gradually — sudden big changes can shock your soil microbes and plants
5. The best soil for tomato plants is well-aerated
Well-aerated soil means the soil naturally has lots of tiny air spaces between soil particles.This allows oxygen to easily reach the roots, which plants need to "breathe" (roots perform a form of respiration, just like leaves). Well-aerated soil helps roots grow faster, stronger, and deeper because they can easily find both water and air. A plant grown in well-aerated soil can support more and bigger fruit.
Compacted soil, on the other hand, is packed down tightly, which crushes those tiny air spaces. Fewer air pockets restrict oxygen in the soil and makes it hard for roots to grow. They struggle to spread out and grow deeply. A smaller root system limits how much water and nutrients the plant can access and makes it weaker and more vulnerable to stress like heat or drought. Soil can become compacted with heavy foot traffic, frequent tilling when the soil is wet, or using heavy machinery over your garden surface.
Here’s how you can know if your soil is well-aerated.
- Aerated soil feels like a sponge — it’s firm enough to hold water but light enough to let air through. It’s loose and crumbly.
- Compacted soil feels like a brick — heavy, hard, and suffocating to plants. It’s hard and dense.
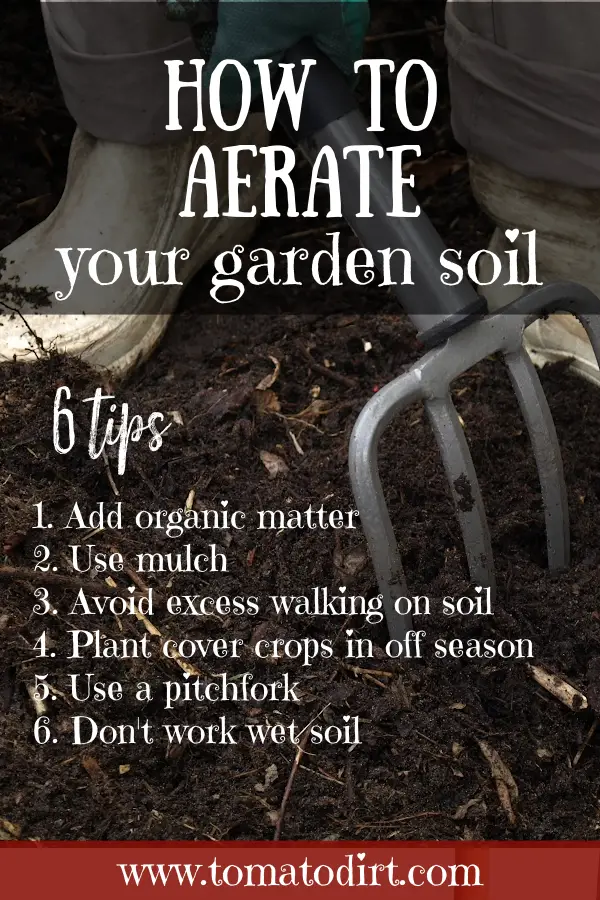
Quick tips for aerating your soil and preventing compaction
Here are easy ways to keep your tomato soil well-aerated and avoid compaction:
1. Add organic matter regularly
Mix in compost, aged manure, or shredded leaves before planting and throughout the season. Organic matter lightens the soil structure, keeps it crumbly, and naturally boosts aeration. Aim for at least 2–3 inches of compost mixed into the top 6–8 inches of soil each season.
2. Use mulch
Apply 2–4 inches of straw, shredded leaves, or wood chips around your tomato plants. Mulch protects the soil from heavy rain, which can cause the surface to seal and compact. It also keeps moisture levels steady, reducing stress on roots.
3. Avoid excess walking near your tomato plants
Create clear paths and only step in designated walkways — not near the root zones. If you grow in raised beds, this is even easier because you naturally avoid stepping into the beds.
4. Plant cover crops in the off season.
In the fall, sow cover crops like clover, vetch, or rye. Their roots loosen the soil underground, and when you chop them down in spring, they add even more organic matter.
5. Use a garden fork or pitchfork
Instead of turning the soil aggressively with a shovel (which can break apart soil structure), use a broad fork or pitchfork. Push it into the ground and wiggle gently to open up air spaces without disturbing soil layers too much.
6. Don’t work wet soil.
Never dig or till when the soil is soggy — this squashes the air out and leads to hard clumps. Instead, test the soil before tilling. Grab a handful of soil and squeeze it. If it crumbles easily, it’s good to work. If it sticks together like clay, wait for it to dry a bit.
Build the best oil for tomatoes
over time
What if your garden soil isn’t perfect, especially the first year or two that you grow a garden?
It won’t be.
Your tomato plants and other crops can survive a less-than-ideal home and still provide you with a stellar crop. Be patient with your soil … and with yourself. Take time to observe drainage patterns … monitor the pH … improve the soil. And always, always, always add organic matter.
Over time, your soil will become richer and your harvests will become healthier. And so will your joy in growing them.
More Tips for Planting Tomato Plants
When to Plant Tomatoes: A Helpful Guide ...
Tomato transplanting mistakes to avoid when setting out plants ...
How to Plant a Tomato Plant: A Step-By-Step Guide ...
What’s the Best Spacing for Planting Tomatoes?
Trench Planting for Tomatoes: Do’s and Don’ts ...
Planting tomato plants: Frequently Asked Questions (FAQs) ...
Get more tomato planting tips on our Pinterest board...
As an Amazon Associate and Rakuten Advertising affiliate I earn from qualifying purchases.
SHARE THIS PAGE:
FREE! 10 Must-Know Tomato Growing Tips: 20-page guide
Get yours here:
